Description
- Beacon is an infrared based signal transmitter for sending lap and split signals to the Collector.
- Each time a Collector with a lap receiver connected passes a beacon, a split or a lap point is marked to the data.
- Beacons are to be placed along the track so that there must be a line of sight between the lap receiver and the beacons.
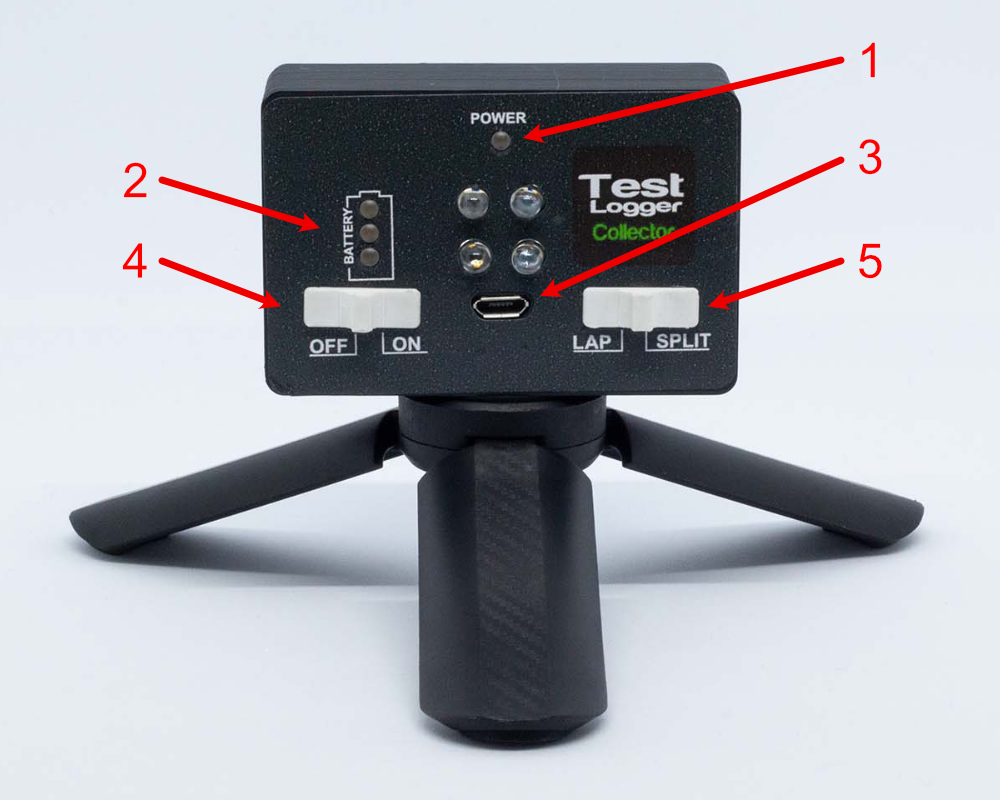
- Power/charge LED
- Battery level indicator
- Charging port
- Power switch
- Mode switch
Operation
Switches
- Power switch (4) is to turn on and off the beacon
- Mode switch (5) is used to change the beacon operation mode. The selected mode changes the transmitted signal which indicates for the logging unit to mark lap and split points correctly to the data.
- Lap mode for getting lap times. It is recommended to have only one beacon in lap mode
- Split mode for splitting the track to two or more sectors. There is no limitations how many split beacons you have around the track.
Charging
- Beacon is charged with micro-USB cable from the micro-USB port (3).
- When battery is charging the power LED (1) is bright red
- When battery is fully charged, the power LED (1) is light red
Battery indicator
| LED | Voltage | Hours left |
|---|
| 3 green | 4.2V-4.0V | 15 → 13 |
| 2 green | 4.0-3.8V | 13 → 10 |
| 1 green | 3.8-3.6V | 10 → 5 |
| 3 red | 3.6V-2.9V | 5 → 0 |
How to place the beacon?
- Usually it's best to place beacons on the inside of the track. In other words the IR beam points out from the track. Then beacons don't interfere on other sections of the track.
- Typically it's best to place the beacons on straights and not on the middle of corners.
- Recommendation is to place beacons close to the same level with the IR receiver in the car to ensure best possible operation. Typically jumps, crests and pits might not be a good idea even though the tripods have some tilt-capability.
How to place the lap receiver to car?
See page TL0103006 - Lap receiver